Showing posts with label Unusual Materials. Show all posts

Saturday, April 4, 2015

Steampunk Wedding

So I was lucky enough to have a friend throwing a steampunk themed wedding, costumes required.  Well *cracks knuckles* I think I can handle this challenge!  1. black corset 2. blue and black lacy dress 3. mini top hat 4. navy blue tights layered with black fishnets 5. golden key shoes 6. bustle 7. bracelet, 8. test tube garter, 9. purse, 10. Party!

Lets start off with a doll's top hat, a metal clock scrapbook addition, a tulle veil, bit of ribbon and a giant peacock feather.  All found at your local craft store and hot glued together to a standard black headband while watching too much Life.


Next up the purse, 'cause let's be honest, my corset and dress won't have pockets.  Also it's rare to find to find any woman's clothing item with any reasonable sized pockets, we do have needs clothing designers!!  One cheap fake leather black purse, another metal clock from the scrapbooking section, bronze chain from jewelry, and a bit of metallic thread...BOOM.


Now for a little bit of sass.  Some leftover tulle, ribbon, and steampunk-ish lock decorations and I have a clever way to hide my digital watch.  It's all about appearances and I would feel naked without my watch so, concessions had to be made.


Speaking of black tulle, I probably shouldn't be proud that I just happened to have 10 yards just sitting in my house for a rainy day.  Today is that day!!  I needed a little bustle for my tussle, and with a little help from the folks on tumblr I slapped some tulle, ribbon, and fabric together over the weekend.


No pictures of this one but my shoes, let me tell you about my amazing shoes.  There is a thing called rub 'n buff which is a wax based product and they sell it in a bunch of metallic colors, perfect for steam punk. I used antic gold rub 'n buff on an old pair of black flats and then sewed a couple of dangling keys onto the back of the heels, perfection.  Add on a test tube garter (test tubes hot glued to a thin black belt and some navy ribbon) and I was set to go!

Luckily I got to the wedding site a day early so I could do last minute costuming for a couple of my friends... 3 emergency mini hats, 2 necklaces, and a set of earrings later we were all ready for the wedding!


Monday, January 27, 2014

Paper Roses

I'm still not 100% sure why I NEEDED to make a bouquet of paper roses, but no regrets here!  I followed these instructions, and sacrificed some discarded/weeded library books for the cause.  The ruler is for scale because they ended up to be a crazy huge bunch in comparison to their thin wire stems. For a couple of them I put fake pearls in the center of the rose to add a little something special.

Sunday, December 15, 2013

Doctor Who Cookie Cutters

I pulled out my TARDIS door covering and repurposed it for my new apartment door... why did it have to open from the opposite side as my last apartment?!?  Anyway it was a great way to start an all day Doctor Who Marathon party and cookie baking session.


But that's old news, the new addition to my crafty Doctor Who world are 3D printed cookie cutters!


Not too shabby!  Cybermen, adipose, Tardis, David Tennant, K9, Matt Smith, and (not featured because they were too delicious) daleks.  I tried out this pattern on thingiverse, the go to place for crowdsourcing 3D printed files.  It worked nicely but it didn't quite have the dalek angle that I wanted (more eyestalk!) and the second part of the cutter that made the impressions, well it wasn't impressive at all.  So I ended up making a lot of custom files using cookie caster and pics from the internet.  It took me a couple of tries to get the right thickness of cookie cutter.  On the thinest setting the makerbot I was using often translated the single line into two thin lines with space in-between. Queue hours of cleaning out cookie dough with a toothpick--no good.  The thickest setting was, well too thick and could probably be used for ink printing... but not cookies.  Somewhere along the way there is a happy medium for a solid reusable (handwash) cookie cutter.   I used PLA plastic and a Makerbot Replicator 2 and 2x.  Since the cookie cutters have such little surface area I had to put a raft on it so that it would stick to the print bed and not pop off mid print :(  which happened a fair amount especially on the Replicator 2x's heated print bed.  But hey cookie party achieved!


Tuesday, December 3, 2013

An Impromptu Christmas

Living in an apartment and traveling for the holidays, it didn't make sense to get a real tree so I decided to make one.  Weekend Challenge: no supplies runs, no prep work, using the materials currently in my house make a 3 dimensional Christmas Tree.  No problem!  1) Easel, 2) green fabric-ish stuff, 3) Construction Paper, 4) Penn State themed ribbon, 5) Buttons!    Done.

Wednesday, November 27, 2013

Tentacle Toothbrush Holder: 3D Printing

I'm so excited to test out the 3D printer in my local makerspace!  I'm using a Makerbot Replicator 2 with PLA and a Makerbot Replicator 2x with ABS plastic.  I've been browsing thingiverse to find the perfect projects.  I have discovered, I desperately want a Cthulhu toothbrush holder, but since that has yet to become a "thing" and I don't have the talent ie patience to design one... I guess I'll settle for tentacles!


On unrelated news I've also tested out 3D printing a spork (it was very sharp)


and this LionFish!  I actually made two because they printed out so beautifully!  But beware they tended to pop off the print bed if the temperature on the machine was a little off or the painters tape was old.

Friday, September 13, 2013

Wall Hangings Done Easy!

I finally finished setting up my new apartment this week which means I can finally start decorating! Wallhangings done cheap and easy are my specialty this week.  So I stopped by the dollar store and got comic book themed washcloths!  Stretched and stapled to foam board, they look great!


As for supplies, all you need is fun fabric or washcloths, foam board (single ply works), an x-acto knife, ruler, stapler, adhesive hanging eyes, and little wire command strip hooks.


These will look great on my wall!

The Captain's Chair

Problem: I have a blue Ikea chair with the most unfortunate 21" circular stain.  I've washed and cleaned it so many times but the stain won't come out.

Solution: I could spend a lot of time and fabric making a chair cover OR I could paint over the circular stain with a circular logo... Captain America's Shield!  Avengers Unite!

Stage one was to use white fabric paint as my primer and paint over the entire circle, don't forget to put cardboard behind it first to stop bleed through.  Trace out the design with pencil, pen, or sharpie... it doesn't matter!  Then with lovely metallic acrylic paint, make that design beautiful.  Got icky edges?  A thin border of black puffy paint will make it pop!  Feeling extra artsy?  Cover and tape off the non painted parts of the chair and give it a quick spray coat of crystal clear.

Progress Pic:


One weekend later, presto!  Your very own Captain's Chair!


Thursday, January 26, 2012

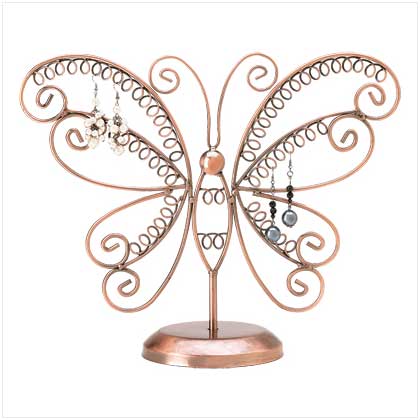
Wire Butterfly Jewelry-Holding Thing

A work in progress: Wire Butterfly Jewelry-Holding Thing made entirely out of the random supplies in a crafter's room.  Plus kudos to internet inspiration.  And now for the in-progress quick pic:


And now for the later that night finished product pic: